Thursday, April 29, 2010

英文电子邮件高频句

1. initiate a meeting

I would like to hold a meeting in the afternoon about our development planning for the project A.

I suggest we have a call tonight at 9:30 PM( China Time ) with you and Brown. Please let me know if the time is okay for you and Ben.

We`d like to have the meeting on Thu Oct 30. The same time.

Let`s make a meeting next Monday at 5:30 PM SLC time.

I want to take to you over the phone regarding issues about report development and the XXX project.

2. Seeking for more information/feedbacks/suggestions

Shall you have any problem accessing the folders, please let me knows.

Thank you and look forward to having your opinion on the estimation and schedule.

look forward to your feedbacks and suggestions soon.

What is your opinion on the schedule and next steps we proposed?

What do you think about this?

Feel free to give your comments.

Any question, please don’t hesitate to let me know.

Please contact me if you have any questions.

Your comments and suggestions are welcomed!

Please let me know what you think!

Do you have any idea about this?

It would be nice if you could provide a bit more information on the use’s behavior.

At your convenience, I would really appreciate you looking into this matter/issue.

3. Give feedbacks

Please see comments below.

My answers are in blue below.

I add some comments to the document for your reference.

4.Attachment

I enclose the evaluation report for your reference.

Attached please find today’s meeting notes.

Attach is the design document, please review it.

For other known issues related to individual features, please see attached release notes.

5. Point listing

Today we would like to finish following tasks by the end of today:

1….; 2….;

Some known issues in this release: 1….; 2….;

Our team here reviewed the newest SCM policy and has following concerns: 1….; 2….;

Here are some more questions/issues for your team: 1…; 2….;

The current status is as following: 1….; 2….;

Some items need your attention: 1….; 2….;

6. Raise question

I have some questions about the report XXXX;

For the assignment ABC, I have the following questions:……

7. Proposal

For the next step of platform implementation, I am proposing…

I suggest we can have a weekly project meeting over the phone call in the near future.

Achievo team suggest to adopt option A to solve outstanding issue…

8. Thanks note

Thank you so much for the cooperation!

I really appreciate the effort you all made for this sudden and tight project.

Thanks for your attention!

Your kind assistance on this are very much appreciated.

Really appreciate your help!

9. Apology

I sincerely apologize for this misunderstanding!

I apologize for the late asking but we want to make sure the correctness of our implementation ASAP.

Monday, April 26, 2010

How to: Setup Qt 4.5+ Visual Studio Integration

By dcsoft
QT IS NOW RELEASED UNDER LPGL

Qt is a cross platform GUI toolkit which was acquired from Trolltech by Nokia.  Starting with Qt 4.5, it is dual-licensed under both LPGL and Commercial.  The Commercial license can be a bit pricey, but the LPGL license means you can use it free of charge to develop proprietary, commercial, closed-source software.  Instantly, Qt has become available to a wide audience of software developers (DCSoft included).  Thank you Nokia!

More than a year ago, DCSoft has become very interested in Qt.  Much as we love MFC, it hasn’t changed much since 1999, and this is 2009.  Qt is easy to learn given its concise syntax and documentation, plugs into Visual Studio (more below), comes with a supported toolset including Designer (a resource editor), Linguist (a localization tool), and Qt Creator (an IDE), giving Qt more momentum than MFC, and a higher performance alternative to .NET.  It’s easily one of the best ways to create Windows apps, never mind it can also target Mac, Linux, and several embedded devices.

Starting with Qt 4.6, the LPGL version now comes pre-built for Visual Studio 2008 RTM.  If this fits your need, you can simply install it and skip to INSTALL VISUAL STUDIO ADD-IN. However, you will need to build Qt yourself if:

  1. You are using VS 2008 and you have installed SP1 and/or the ATL Security Update, and you are building your app with the _BIND_TO_CURRENT_VCLIBS_VERSION defined (or another means to specify the non-RTM version).  This is because both Qt and your app need to be built with the same version of the Visual Studio redistributables, and Qt has been built with RTM, but your app is not being built with RTM.
  2. You are using any version of VS 2005.  This is because Qt does not come prebuilt for VS 2005.

Here’s how to get our favorite IDE (Visual Studio 2005/2008) working with Qt!

DOWNLOAD QT SOURCE CODE

As the option to download only the Qt source code is a bit obfuscated on the current Nokia website, please follow these directions:

  1. Go to http://qt.nokia.com/downloads and click the Go LGPL button.
  2. Since you want only source code, look at the Qt: Framework Only column on the right.  Click e.g. Download Qt libraries 4.6.1 for Windows (VS 2008, 194 MB) — choose the VS2008 one.
  3. This starts the download for pre-built Qt.  But we don’t want that as we will be building Qt ourselves.  A page will appear with <Source code available on this link>.  Cancel the Save As dialog in your browser to cancel the binaries download you had clicked on, then click on this link, e.g.http://get.qt.nokia.com/qt/source/qt-everywhere-opensource-src-4.6.1.zip
  4. Unzip the file into e.g. c:\qt\4.6.1-vc.  Please use a path with no embedded spaces, as the Qt build tools have issues with them.
SET ENVIRONMENT VARIABLES

Open Computer Properties | Advanced system settings | Environment Variables:

  1. Edit environment variable to add:  QTDIR = c:\qt\4.6.1-vc
  2. Edit the PATH environment variable to add:  %QTDIR%\bin
  3. Either close all command prompts and Visual Studio instances, or reboot the computer so the new command-line takes effect.
BUILD VC++ VERSION OF QT
  1. Open a Microsoft Visual Studio Command Prompt, which is a command console with environment variables set for the specified VS.  This is easily accomplished using Start | All Programs | Microsoft Visual Studio 2005 (or 2008) | Visual Studio Tools | Visual Studio 2005 (or 2008) Command Prompt.
  2. Cleanup any previous build:
    1. c:\> cd c:\qt\4.6.1-vc
    2. c:\qt\4.6.1-vc> nmake distclean
    3. c:\qt\4.6.1-vc> rm -rf tmp*  // <– recursively remove all tmp\ folders and files

This requires finding a *nix workalike.  I use Total Commander to search for Tmp*, select all the found files, and delete them with one keystroke.

3. Run Configure to target platform vc2005 or vc2008:

c:\qt\4.6.1-vc> configure -platform win32-msvc2005<other options as needed>

Substitute win32-msvc2008 for VC2008

Run Configure with no parameters to see a help screen.  Configure generates nmake compatible makefiles to build all the Qt DLL’s, tools, and demos.

4.  Run nmake to build.

c:\qt\4.6.1-vc> nmake

It will take awhile, but this grinds through building the specified Qt DLL’s, tools, and demos with Visual Studio.

INSTALL VISUAL STUDIO ADD-IN

The Qt Visual Studio Add-in is indispensible for developing Qt apps in Visual Studio. The Add-in has replaced the previous Qt Visual Studio Integration, which was only available to Commercial customers.  Now the Add-in is used by both LPGL and Commercial licensees, and the Integration has been deprecated.  While the Add-in does not allow integrated .ui editing (it instead launches Qt Designer to edit .ui files), it is fully supported and maintained by Nokia, whereas the Integration hadn’t been modified since the 4.3/4.4 timeframe.

Because Visual Studio Express does not allow add-ins, using these free versions of Visual Studio is not recommended for Qt development.  You need at least Visual Studio Standard (Pro, Team System, etc. of course will also work).

1.  Download and install the Qt Visual Studio Add-in to install the Qt plug-in into Visual Studio (both 2005 and 2008 are supported by the add-in).

2.  Start Visual Studio.

3.  Select menu Qt | Configure Qt Versions.  Add c:\qt\4.6.1-vc.

4.  Now Qt is fully functional, and you can use VS2005/2008 to build Qt apps.

QT IN VISUAL STUDIO

1.  See Qt menu item.  Launch Qt Designer (the Resource editor) and Qt Linguist (the localization tool).

2.  Create new Qt projects.  File | New project, select Qt4 project.

3.  Read Qt Help.  Available from Help menu (Qt help is merged in with Visual Studio Help and viewed in Document Explorer.)  Or, manually launch

C:\Qt\4.6.1-vc\bin\assistant.exe

4.  The Whole Tomato Visual Assist X plug-in is highly recommended to develop Qt within Visual Studio.  See thisblog entry for tips.

Qt installation for Visual Studio

For professional and express edition.

The steps for a successful integration of Qt in Visual Studio IDE are as follows:

Pre-requisites:

Make sure the platform SDK is installed if using Express Edition of Visual Studio.

Visual Studio Express and the platform SDK can be downloaded freely from Microsoft downloads.

STEP 1:

Download the Qt library form Nokia’s website and select “LGPL/Free Downloads”;

Although the SDK mentions that its based on MinGW and do not support VS compiler, it does not matter. Qt can be made compatible with VS.

STEP 2:

Set the environment variable: “C:\Qt\2009.01\bin” and “C:\Qt\2009.01\qt\bin”. The only thing we need to pay attention is the semicolon between two paths.

STEP3:

Open Visual Studio Command Prompt, which may be located in “Start > Program Files > Visual Studio > Visual Studio Tool > Visual Studio Command Prompt”;

Go to the folder which Qt installed. You may run command “cd c:\Qt\2009.01\qt”;

Type in “configure” and run. This command will configure Qt library for your computer. If you have multiple compiler installed, you may use “configure –platform win32-msvc” to emphasize which compiler you want to use!

STEP4:

Run “nmake” in the command prompt, which may cause lots of time!

This document is based on Kabilen’s instruction! You may contact the author by “kabilen@delinkx.com”.

【CSDN】有关设计模式的一点讨论

举个例子,比如我新建了一个模板。模板里面可以添加无数个图层,每个图层都有N多个操作动作。
所有图层的操作都是串行进行的,现在要实现PS里面的撤销重复功能,如下图
步骤 0 1 2 3 4 5
类型 新增layer1 新增layer2 move layer1 删除layer2 新增layer3 move layer3
那撤销时,从第5个步骤往回一步步执行
我的实现方法是,先定义一个动作命令基类,再定义一些动作命令的派生类

   1:  type
   2:    TCommand = class
   3:    private
   4:      FLayerData : TData;//对应的图层数据结构体
   5:    protected
   6:      procedure DrawLayer; virtual; abstract;  
   7:    public
   8:      procedure Execute;//在这个过程中执行 DrawLayer过程
   9:    end;
  10:    //移动
  11:    TCommandMove = class
  12:    private
  13:      FLayerData : TData;
  14:    protected
  15:      procedure DrawLayer; override;  
  16:    public
  17:    end;
  18:    //重画
  19:    TCommandReDraw = class
  20:    private
  21:      FLayerData : TData;
  22:    protected
  23:      procedure DrawLayer; override;  
  24:    public
  25:    end;


新建的模板也有一个对应的类


  TComBine = class
private
FList : TList ; //用于添加动作类
FCommand : TCommand ; //动作命令类
FCurIndex : integer; //当前执行的操作列表下标
protected
public
property Items[Index : integer] : TCommand read SetItems write GetItem;
end;


每进行一个操作,就添加在TComBine 中添加一个具体的动作命令类对象,然后让动作命令类对象去执行相应的操作
撤销和重复时,只要修改FCurIndex 属性,然后用 TCommand(items[i]).Execute;
当有撤销操作时,再新增操作,直接将当前步骤之后的动作命令类对象全部销毁,类似于PS中的功能(撤销后再操作,当前步骤之后的操作就没了)
现在出来的问题:
比如从第5撤销到第4步时,它的操作应该是将 layer3 移到新建的位置,那我具体要怎么处理?直接执行第四步的话,它会创建一个LAYER,这显然不符合要求
又或者从第4撤销到第3步时,实际操作是删除layer3,直接执行的结果是将layer2删除
可能是我的处理模式本来就有问题,不知道大家有没有什么可行的方案可分享一下?不胜感激!!


网友 CoderPlusPlus 提出了一种方法:


你的每个动作类都定义Execute方法和Undo、Redo方法,例如新建动作,Execute方法里进行新建,Undo里执行删除,Redo里也是新建
用一个栈来保存命令,执行命令时先将其入栈,然后执行Execute,需要撤销时栈顶做临时回退(此时只是栈顶的移动,实际命令对象还没有真正出栈,同时记录原栈顶),同时对经过的每一个命令对象执行Undo,在执行若干次撤销后有两种情况,如果调用了新的命令,此时此前撤销过的命令对象真正出栈,而如果选择重复,则栈顶前进,经过的命令对象执行Redo方法,这样可实现任意次的撤销与重复
总之思想就是把命令会引起变化的状态的初值和终值由命令对象来保存
下面是一个简单示意图:


{依次执行C1、C2、C3命令后的命令栈}


C1——C2——C3(Top)


{执行两次撤销后的栈,此时C2、C3处于“待定状态”}


C1(Top)——C2——C3


{执行一次重复,此时C3处于“待定状态”}


C1——C2(Top)——C3


{执行C4命令}


C1——C2——C4(Top)


weiym给出了如下的代码和分析:


LZ有没有看我那个程序, 实际上用的是设计模式里的Command模式,
那里面包含3种操作:新画一个图形, 橡皮擦掉一个图形,改变选择区域,
分别对应不同的Command: CSCGraphAddCmd,CSCGraphEraseCmd,CSCSelectRectChangeCmd.
然后由CSCCanvasCmdMgr来对所有的操作进行管理,它里面有2个Stack: m_arUndoCmd和m_arRedoCmd, 分别保存Undo和Redo的操作。

class CSCCanvasCmdMgr: public CRefCountBase
{
public:
BOOL IsUndoStackEmpty();
BOOL IsRedoStackEmtpy();

BOOL Undo();
BOOL Redo();

VOID OnAddGraphDone(CRefPtr<CSCGraphObject> pGraph);
VOID OnEraseGraphDone(CRefPtr<CSCGraphObject> pGraph);

VOID OnSelectRectChangeDone(CRect& rtOld, CRect& rtNew);

protected:
std::list<CRefPtr<CSCCmdBase> > m_arUndoCmd;
std::list<CRefPtr<CSCCmdBase> > m_arRedoCmd;
};


当你新画了图形时, 传入新画的图形对象,调用OnAddGraphDone, 在里面构造一个新画Command,保存到Undo的Stack;如果要撤销你的新画动作, 就从Undo Stack里面把你的最新Command出栈,并调用它的Unexecute(), 因为你的这撤销动作也能Redo, 所以同时又要把它存到redo的Stack;如果你要redo这个动作,就把它存会undo stack, 同时调用它的Execute().
然后就要看你各个动作的Execute和Unexecute怎么实现了。
总之,原理就是把你的各个动作封装成就Execute和Unexecute功能的Command对象,然后参照上面的原理就可以了。


我感觉这个就是典型的Command模式,遇到典型的例子真是又形象又直接!收益非浅!


Friday, April 23, 2010

【程序即人生】Boost::Bind

这次的主题是boost:bind。在历经了
boost::asio(1)
boost::asio(2)
boost::asio(3)
boost::foreach
boost::function
boost::lambda
boost::serialization(1)
boost::serialization(2)
boost::string_algo
boost::thread
之后,boost常用的很多都学会了,现在自己写点小东西,那是大胆的用大。。。。。。。呵呵,反正自己的东西,就当用来锻炼技术了。在学习boost::signal2的过程中发现自己其实对boost::bind这个将来要进C++标准的库了解还不够多,(在boost::functon中有所提及,也同时学了一点),所以抽了点时间,好好的学习了一下。

Purpose

原来文档中的purpose完全就是教程了,事实上,bind主要用于改造函数,比如,一个地方需要一个无参的函数,你只有一个以int为参数的函数,并且你知道此时int一直为1就可以了,你怎么办?传统方法,直接实现一个函数,然后以1调用以前的那个int为参数的函数。如下:
void  Fun1(int  i) {
    printf(" %d \n " , i);
}
void  FunWeNeed() {
    Fun1(1 );
}
int  main()
{
    FunWeNeed();
return 0 ;
};
当然,这个例子太扯了,我们只需要直接用Fun1(1)调用就可以了,但是bind的目的就是如此,只不过现实中因为各种各样的原因,你的确需要改造函数。再比如下面的情况,你有一个原来写好的函数,接受一个以无参函数为参数,那么,你的Fun1就没有办法派上用场了,那么,传统上,怎么办?如下:
typedef void  FunWeNeed_t(void );
void  CallFun( FunWeNeed_t f) {
    f();
}
void  Fun1(int  i) {
    printf(" %d \n " , i);
}
void  FunWeNeed() {
    Fun1(1 );
}
int  main()
{
//  CallFun(Fun1);          // this line can't compile
    CallFun(FunWeNeed);
return 0 ;
};
Ok,你不得不写新的函数以满足需求,因为你没有简单的办法改变一个函数的参数。事实上,假如你是STL流派的话,那么随着你使用标准库的算法的次数的增加,你会遇到越来越多上面描述的情况,到底很简单,C++是如此的类型安全的语言,它不会加上诸如参数过多就忽略后面参数的胡扯特性。那么,一个算法需要你传进来的是什么形式的函数(或者函数对象),那么你就的怎么做。
去看看,标准库中提供了一大堆多么扯的函数对象吧,less, more,,greater_equal,not1,not2,。。。。。。然后还给了你一堆compose1,compose2........最后附带最恶心的bind1st,bind2nd,事实上,这些东西如此之多,以至于我甚至懒的列举出来,但是事实上我们在项目中用到了多少?简而言之,None!一次也没有,甚至因为很多算法与此相关,我们连那些算法也不用!
为啥C++当年出现了那么多奇怪臃肿无用的设计?可能是,C++标准出现的那个年代,编程技术的发展也就到那个地步吧。。。。。。。。。在C/C++语言中,关于函数的抽象特别的少,原因很简单,因为函数指针太不好用了!(函数抽象也用,但是好像用的最多的是在C语言中无物可用时,不得已的而为之)
记得在哪看过一句话,技术再花哨也没有用,最重要的是足够简单,因为不够简单的技术就很难给人讲解,别人很难理解那么就很难应用。这些C++特性应该算是其中的一例了。
boost中的bind,function ,lambda 就是为此而生的。注意,在tr1中,你就已经可以使用bind和function特性了,这也很可能是将来的C++标准之一。现在boost中的lambda还不够成熟,语法很怪,限制很多,因为,毕竟,boost再强大,仅仅是库啊。。。。。。。。。匿名函数的功能完全值得用语言特性来实现!
上面那个很扯的例子,总的给个bind的解决方案吧。
#include <boost/bind.hpp>
#include <boost/function.hpp>
void  CallFun( boost::function<void (void )> f) {
    f();
}
void  Fun1(int  i) {
    printf(" %d \n " , i);
}
void  FunWeNeed() {
    Fun1(1 );
}
int  main()
{
    CallFun(boost::bind(Fun1, 1 ));         // this line can't compile
    CallFun(FunWeNeed);
return 0 ;
};
需要注意的是,此时不能再使用函数指针了,bind的天生合作伙伴是function,而function是支持函数指针的(如上例所示) 。目的将的很多了,下面看看用法吧(不是什么问题)。

普通函数

最有意思的是,你甚至能用bind来扩充原有函数的参数,见下例:
#include <iostream>
#include <boost/bind.hpp>
#include <boost/function.hpp>
using namespace  std;
using namespace  boost;
void  f(int  a, int  b)
{
    cout <<"Argument 1 is "  <<a <<endl;
}
void  g(int  a, int  b, int  c)
{
    cout <<"sum is "  <<a+b+c <<endl;
    cout <<"arg 1: "  <<a <<endl;
    cout <<"arg 2: "  <<b <<endl;
    cout <<"arg 3: "  <<c <<endl;
    cout <<"---------------------------"  <<endl;
}
int  main()
{
    function<void (int ,int )>  f1= bind(f, _2, _1);                 // 调整参数1,2的位置
    f1(1 , 2 );
    function<void (int )> sum1 = bind(g, _1, _1, _1);        // 3个参数变1个
    sum1(10 );
    function<void (int , int )> sum2 = bind(g, _2, _2, _2);       // 3个参数变2个,仅用一个
    sum2(10 , 20 );
    function<void (int , int , int )> sum3 = bind(g, _3, _3, _3);      // 3个参数还是3个,但是仅用1个
    sum3(10 , 20 , 30 );
    function<void (int , int , int , int )> sum4 = bind(g, _4, _4, _4);     // 3个参数变4个,但是仅用1个
    sum4(10 , 20 , 30 , 40 );
return 0 ;
};
输出结果:
Argument 1 is 2
sum is 30
arg 1: 10
arg 2: 10
arg 3: 10
---------------------------
sum is 60
arg 1: 20
arg 2: 20
arg 3: 20
---------------------------
sum is 90
arg 1: 30
arg 2: 30
arg 3: 30
---------------------------
sum is 120
arg 1: 40
arg 2: 40
arg 3: 40
---------------------------

函数对象

注意用法中很重要的一条:通常情况下,生成的函数对象的 operator() 的返回类型必须显式指定(没有 typeof 操作符,返回类型无法推导)。(来自Boost文档)
#include <boost/bind.hpp>
#include <boost/function.hpp>
using namespace  std;
using namespace  boost;
struct  F
{
int operator ()(int  a, int  b) { return  a - b; }
bool operator ()(long  a, long  b) { return  a == b; }
};
int  main()
{
    F f;
int  x = 104 ;
    function< int (int ) > fun1 = bind<int >(f, _1, _1);      // f(x, x), i.e. zero
    cout <<fun1(1 );
    function< bool (long ) > fun2 = bind<bool >(f, _1, _1);       // f(x, x), i.e. zero
    cout <<fun2(1 );
return 0 ;
};
其他的也就很简单了。

成员指针

例子来源于boost文档。
#include <iostream>
#include <boost/bind.hpp>
#include <boost/function.hpp>
#include <boost/smart_ptr.hpp>
using namespace  std;
using namespace  boost;
struct  X
{
void  f(int  a) {
        cout <<a <<endl;
    }
};
int  main()
{
    X x;
    shared_ptr<X> p(new  X);
int  i = 1 ;
    bind(&X::f, ref(x), _1)(i);     // x.f(i)
    bind(&X::f, &x, _1)(i);         //(&x)->f(i)
    bind(&X::f, x, _1)(i);          // (internal copy of x).f(i)
    bind(&X::f, p, _1)(i);          // (internal copy of p)->f(i)
return 0 ;
}
可见bind的强大,支持自己拷贝需要的对象,支持引用,甚至,支持智能指针。
最后一个例子,结合标准库容器及算法的例子,这才是展示bind的强大的地方。
还是来自于boost文档。
class  image;
class  animation
{
public :
void  advance(int  ms);
bool  inactive() const ;
void  render(image & target) const ;
};
std::vector<animation> anims;
template <class  C, class  P> void  erase_if(C & c, P pred)
{
    c.erase(std::remove_if(c.begin(), c.end(), pred), c.end());
}
void  update(int  ms)
{
    std::for_each(anims.begin(), anims.end(), boost::bind(&animation::advance, _1, ms));
    erase_if(anims, boost::mem_fn(&animation::inactive));
}
void  render(image & target)
{
    std::for_each(anims.begin(), anims.end(), boost::bind(&animation::render, _1, boost::ref(target)));
}
例子展示了erase_if,for_each算法中使用bind的方法,当然,实际中,假如是你的游戏引擎中的update,render函数,碰到上述需求或者类似代码实现是很正常的,但是,你会放心的仅仅为了简化一些代码,然后将如此性能相关的位置,直接交给bind吗?

Wednesday, April 21, 2010

【转】美剧字幕组长讲述她如何练听力的

她的新浪博客:http://blog.sina.com.cn/loveandpeacejoy

今天写点儿正事。说说该如何修炼咱们的耳朵。此文只针对能力的提高,不针对应试!往往能力提高了,应试就不会有问题!

先说一个基础问题:有一个真理是不变的,那就是,语言,是一种能力。听、说、读、写,四种能力任何一个,没有连续的三个月以上的辛苦付出,是不会有显著提高的。不管怎样的方法,怎样的秘诀,如果你不坚持,是不可能有任何提高的,所以这个得先明确了。

其次再来说技术性问题:该如何练听力。不同人适合不同的办法,没有一套方案是可以做到放诸四海皆准的。所以我只能分享我自己的练习耳朵的过程,然后提些建议。

1. "到底应该怎么练听力啊?"
我正式开始重视起听力,是从大一开始的。郑老师给我们推荐Step by Step四册书听,于是我就和张希开始每天听这套书。一共四册,我每个学期听一册,用两年听完了这四册书,上面的题都认真做了。最一开始一定是什么都听不懂的,因为高中之前,我基本没怎么练习过听力,准确地说,那时候不知道原来耳朵是需要练习的。。我没有别的办法,听不懂就重新听,用复读机一遍一遍地听,四册书我觉得我听了不下二十遍,听坏了两台复读机,N个耳机,耳朵插耳机插的出水疱,后来换成戴在头上的大耳机就稍微好了些。这套教材很好,因为难度是一点点提升的,所以比较推荐。

除了Step by Step以外,同时进行的听力练习就是听广播。专四有新闻听力,所以我和张希就去店里买收音机,因为是痛下决心要练好听力的,所以我们都狠下心买最好的收音机,接收效果强的那种。于是,我们就买了全店里最大的收音机,比一般的正常收音机都大两倍,我俩买的一模一样的,只是她是黑色的我是灰色的。于是学校里就多了一道亮丽的风景线,总有两个人拿着砖头大的收音机在学校的清晨走来走去,嘴里还一直念念叨叨。

起初刚开始听的时候,听的是VOA,因为传说BBC很快,所以我没敢碰它,只碰了VOA。第一天听的时候我给崩溃掉了,只能听懂"This is VOA。。。"。但是没有办法,只能一天覆一天的听,不能断开。于是我就每天像一个石头一样,早晨六点半到八点整,雷打不动,起床听VOA。正好步行去学校。到后来的时候,八点开始上课了,我还偷偷把天线伸出去继续转台听BBC。大家别觉得听不懂很可怕,咱们是中国人,北方人第一次听广东话也听不懂,但是你多听,硬着头皮听,不就也慢慢能听懂了吗?比如小怡子,她一开始也不懂上海话啊,那么复杂,谁能听懂?但是在上海活了四年,现在小怡子不但能听懂上海话说话,还能听懂上海话骂人,还会说上海话,就是这个道理!所以你别问,你就听。听不懂咋办?听不懂继续听啊!说那么多废话干啥!你就听就行了!只要你别放弃,你早晚有一天能听懂!就比如我,大一一年基本没咋听懂,但是就傻傻地听,在大二的一天早晨,我正在刷牙,广播里好像正在播布什的一个演讲,我突然发现我一字不落的都能听懂了,我一兴奋,就把刷牙水喝了。

后来越听VOA越觉得速度慢,于是转战BBC。第一次听BBC,以为是在辩论会,后来发现,是正常语速,我就给崩溃了。崩溃完以后,继续听,终于发现,要想练耳朵,BBC才是王道。我觉得跟读是一个比较不错的方法,他说一句,你就在三秒钟以后重复他的话,你只要能重复下来,你必定是听懂了才去重复的吧。我就那么一直跟读了好几个月。英音和美音都听习惯了,才是真正听力好。光吃美音,不吃英音,那不行。毕竟现在国际正式场合,新闻发布会的同传之类,都说的是英音。

我就这样听力教材加VOA和BBC,坚持了四年没断,当然肯定有过年之类早晨没起来的可能。但如果一般早晨没起来,那么当天的听力我一定会在下午五点补回来。听力,是需要每天都坚持的,一天都不能断,不能断,把它当成吃饭和喝水。耳朵这个东西,你不用了,一定会生疏的。

如果听广播因为条件等没法做到的人,可以上网听,我博客左边有VOA,BBC,CNN,CSPAN等听力网站的链接,进去以后都有在线可以听的。再说一下,我的这个办法,不可能保证都能提高听力,到底可行不可行,完全看你自己的坚持程度。坚持的时间越久,你的听力会越好。

2. "我真的认真听了,但是我为啥就听不懂呢?"

这是一般人们爱问的第二个问题。我觉得如果听不懂的话,有两个可能。第一,你练习的不够久。比如小怡子,她如果只在上海待了一年,是不可能听懂上海话的,只有她待了四年,她才能真正听懂。明白?第二,很可能是你发音不准。听力能听懂东西,是一个语音识别的问题。比如你一直把"尴尬"念成"监介",那么别人说"尴尬"的时候,你一定听不出来那是"尴尬"。所以,如果你真的很下辛苦练听力了,坚持了至少三个月以上,你还是一点起色都没有,就也许是你的语音识别有问题,当然不可能像尴尬监介那么严重的语音识别有误,但只要发音不准确,就绝对可能导致你听差。这样的情况下,就好好补习一下音标一类的知识,让自己首先能把音念准了,然后再听。这样也许会有帮助。

3. "我听听力的时候总走神,到底怎么回事啊?"
有人听听力总是听着听着就差了,听着听着就走神了,听着听着就睡着了。如果是这样,就说明你不能长时间集中精力做事,这样的话,你要是总走神,就算坚持了三个月,其实也相当于只听了3天的功力,没啥大用。你要是坚持不了,你可以试一下跟读,哪怕隔句跟读,也能保证帮助你集中注意力。因为你要是要做到跟读,就必须使劲听,并努力记忆他的话,这样就可以集中精力了。还有,强烈建议早晨听听力,可以很清爽,不要再睡过去了。

4. "给推荐点儿练习听力的教材哇!"
这个问题我没什么发言权,因为我用过的书版的教材很少,只有Step by Step和中级听力、高级听力。我练听力主要就是听广播了。

5. "咋能通过看电影来练习听力呢?我发现我每次电影看了,但是听力没练"
我自己是在听力练到一定程度以后,才开始做电影的。我最一开始的听力,并不是通过看电影提高的。我最一开始看电影,也是看中央六台那种的,中文配音,中文字幕,跟英文不沾边。后来才开始买碟看(那个年代还没开始流行从网上下载看)。买碟租碟的时候就遇到了问题,说的是英文,我觉得我好像似乎能听懂他们说什么,但是底下的字幕翻译却和我听到的不一样,我就郁闷啦,觉得他们翻译的好烂,自己很愤怒,因为很搞笑的东西我都笑翻了,但是我妈看了底下的字幕都笑不出来。后来就加入了字幕组,一开始没敢尝试听译,因为我对我自己的听力那时候还没自信到那种程度。听电影和听新闻绝对不是一回事,就算你BBC和VOA都听得百分之百了,电影绝对有听不出来的东西,一是因为角色发音各种奇怪,各种口音,二是因为新闻里是正式用语,而电影里是俚语偏多,语速快的时候能吓死人。

你要是选择用电影练习听力,建议最好有听力基础,至少VOA的水平应该能听懂百分之七十。可以选择一部你最喜欢的百看不厌的电影,反复看好几遍,遇到听不懂的地方,拖回来重新听,听了五遍以上若是还没听懂,就不要听了,直接挂字幕看看人家说的是啥,看到subtitle以后再分析一下你为啥没听懂,如果单词明明都认识,但你就是没听懂,那八成就是因为吞音连音等问题。这些问题很好解决,你自己学会这样的读法,下次就能听懂了,还是一个语音识别的问题。

如果你决定用电影来提高听力,那你一定要记住你看这个电影的目的不是for fun,是要练听力,所以别看着看着太高兴,到后来直接挂着字幕一路看过去,那样就没有效果啦。谁最一开始都不习惯看裸片(即无字幕),你得坚持住,哪怕半懂不懂半猜半懂得也得看完,多看几遍,多听几遍,就明白了。然后再外挂字幕看。

6. "为啥电影里总有听不懂的东西"
这个问题我专门问过阿比大叔,就是我最最崇拜的听译牛人,他的答案就是缺乏对画面的分析,在短短两分钟左右的预告片里,很有可能突然插出来一句莫名其妙的台词,这个时候如果能仔细分析背景画面,就能分析出来很多剧情。这点我做的很不好,因为每个预告片里,总有那么一句两句我听不懂,郁闷的要死。还是缺乏练习,得多练多练,啥时候电影能看到阿比大叔那个水平,我就开心了。所以我还要努力!!!

再强调一遍,语言能力的提高,没有任何捷径而言。(有捷径,书山有路勤为径)听说读写四项能力,都是硬功夫,你什么时候不狠下心死练,是不会有实质性提高的。我想起了XDF一个老师说的经典的话,能力提高的最大捷径就是努力,但是努力最痛苦,所以很少人能走成捷径。So,如何提高,其实人们自己心里都清楚,但还是会期望度很高的去问别人该如何做,当得到一个答案的时候,自己又失望,怪人家没有把"真经"传授给你。但其实,世上根本没有什么真经,没有秘诀,唯一有的,只有一日一日的切实付出。如果你能疑虑的少一些,付出的多一些,你的听力早就上去了。(说得多好啊,还说自己语文不好,让本人汗颜了!)

所以,赶快抓起任何一个材料,只要是native speaker说的东西,开始练吧。时间很宝贵。Hard work counts,其他都是扯淡。

单词篇:

Ragbear Survivor听译组组长

我们为什么要默写六级单词?(一种由我发明的英语学习方法的理论化叙述)

WHY

我们为什么要默写六级单词?

◆CET-6在非英语专业的求职过程中起着Vital般的作用。甚至可以说六级这个分数是会伴随你一生的。

◆CET-6这些单词并非是中国CET考试院从某本Dictionary里面挑出来的,而是由美国历史上最著名的词汇家Webster根据生活实际经验以及通过统计学意义上的计算而筛选出来的。

◆因此六级单词非常具有现实意义:(1)六级单词属于报刊文章中出现频率最高的Basic Vocabulary。(2)六级单词几乎涵盖了所有生活中要常用的、比较fancy的meaning.

◆六级单词在考试过程中的重要性比其他考试体现地要明显很多。

◆在听说读写译的五项技能中,先不论最高层次的译。只有说和写才能真正地做到:make a direct profit! 因为只有这两者是output.(只进无出,那叫闷骚!)而写的过程中,拼写这个问题困绕了太多人。英语单词拼错,就像中文写白字那样,是一种写作者自身修养还未到家的体现!

◆何谓我认识这个单词(e.g: exaggerate)?

第一,是音。我听到别人读exaggerate,我明白这是夸张的意思。这就引出了
第二点,意。
第三点,是形。也就是说我看到这个词,我知道她表达的意思是夸张这个concept。。
好,现在我们来过一遍是怎么默写exaggerate这个单词的?首先你听到了发音,如果你熟悉"音",就知道是在说夸张的concept。OK接着开始默,根据发音e-xa-gge-rate。事实上如果你对这个词形不熟悉的话。你根本无法确认自己根据发音而作的拼写是否正确。因此,如果你能准确默出一个单词。95%的情况下说明你对这个word的音形意都掌握了。(5%的情况是:不知道词的意思,恰好根据发音猜对了拼写)

◆因此默写的整个思维过程就是一种将音形意完全融合在一起,相互碰撞,相互促进的BrainStorm(直译)。

◆如果能在读完单词的下一秒中就默出一个单词,95%的情况说明你已经完全掌握这个单词的音形意了。反过来说,如果音形意任何一项的掌握不牢都会导致单词的默写错误。

◆语言学上有所谓的"记单词的最佳路径":先记发音,再通过发音识记词形,最后才是把音形与意通过记忆、实际运用等方式牢牢掌握住。[其实整套学习思维方法Follow的就是这条Best Route]

HOW

我们怎样默写六级单词?

◆我不认识俞敏洪,也和NEWOriental无任何利益瓜葛。但好书就是好书:《六级词汇 词根+联想 记忆法》 [这个软文写的厉害的,不过组长应该是真心推荐的]

◆这本书最好的几个优点叙述如下
(1)分为30个lists。滴水穿石,每天7到8分钟。累计起来不得了。实际上"任务分解法"应该算是一种很好的英语学习方法。
(2)联想法(胡思乱想),词根法,漫画法…俞敏洪同志发扬了无论用什么猫狗方法,只要能背出单词的就是好方法的伟人思路写下了这本书。将各类单词记忆法发挥到了极致!
(3)有mp3光盘。这是默写的基本条件。这其实也预示了另一个真理:词汇书必须有发音光盘。(其实我觉得新东方其实可以做得更好:把例句也读出来,那就更棒了。[伟大的Time1000就是这样的])

◆推荐默3遍。(半年时间内搞定)
每天默1到2个unit。我第一遍默的时候是这样的:第一天晚上先看两个unit。然后勾出自己不稳作的词。第二天早上默。默好后对,错了抄在书上。并再听一遍,跟读,有例句的读例句。第二天晚上再看后面2个unit……
虽然我觉得自己从小就比较注重拼写,但默第一遍时还是会错得比较多,此时一定要挺住。现在错绝对是好事,不错哪能进步。
语言学家说:当接触一个单词7遍后,你将能永远记住这个单词。由于每次默写后还要读一遍,再加上第一遍默的时候还在前一晚看过一遍:加起来正好7遍。

◆Note:当一个单词意思比较多时,不要黑心,每次就记一个意思就成。

口语篇: 我是怎么看friends练口语的
很早就开始看F6,最开始是从起床开始,就一个人对着电脑,傻笑一天,每天吃一顿饭,傍晚和同学一起吃饭的时候,基本就不会说中国话了,被人说什么第一个反应就是英文。周末同学都回家了,更是变本加厉,因为没有人和我说话,内心独白都是F6里的各种声音,还有那种“哄笑”配乐,一个周下来,感觉人快疯了。

大学的时候是为了好玩,没想着真的用它来学英语。

后来工作了几年,因为一直野心勃勃的要去美国公干,所以从那个时候开始重新FAN F6,很长一段时间过去,学下来,感觉有些许体会了,上来冒个泡。

第一遍,带中文字幕看一遍
10季真不是个小数字,看了一遍把当初那种感觉找了回来,所谓的感觉,就是在内心独白的时候都是英语,说话的第一个反应也是英文。

第二遍,带英文字母看了一遍

我买的是60张的那种DVD,英文字母有几季还是不错的,后面的越做越差,真是没法看,就当了剧本。第二次看,基本都能听懂了,就帮着DVD校对字幕,校对的过程中,听力本身就是一个提升。

第三遍,不说你也知道了,去掉字幕,
去掉字母有一个好处,就像丢了拐棍,你听起来就不会像看着英文字母那样一下就反映到脑子里,还要想一下,哦,这个单词是什么来着,因为我们很多时候对于掌握了的单词,突然冒出来,还是会思维停滞一下,就在这停滞的一下,新的内容又冲进来了,你就顾此失彼,到最后,前面的没想起来,后面的又忘了听,刚开始的时候是懊丧不已,因为前两遍的信心全被他给摧毁了,不过没关系,很正常的么,这个地方,你就要不停的重复听,所以你买DVD机比较好,有那个A-B重复健,可以无限重复你要听的句子,你总有想起来的那一刻吧

第三遍是最痛苦的,也是最能升华的一个阶段。
我在做第三遍的时候,是听力口语一起来的,其实这两个本来就是分不开的,

口语,要求自己强力模仿!!!!!注意这个词哦~~~不是吃干饭的,充分利用了A-B健,一个句子重复放,跟着读,然后跟着说,最后脱口而出,一点也不比他们差,甚至可以在语气,语调上,和他们一模一样。作这一部分的时候,我犯了一个错误,就是跟着读剧本,这是十分错误的,正确的做法是,像学鸟叫一样,学他们的声音,不要把自己原来读英文的习惯带到里面去,剧本只是告诉你他们再说什么内容,只是一个提示的作用,因为他们有很多连度,四个音节,在他们嘴里常常变成了2个音节,甚至一个音就带过了,你根本就反应不过来,这也就是我们听不懂他们说话的原因,太快了,而你根本不知道他连读了,如果按照自己的读英文的习惯,永远也做不到他们一样快。所以记住,!!!!!!学他们发出的声音,而不是读他们说出的句子!!!!!!!

这第三遍,我可以用老牛拉破车来形容,实在是很慢很无聊,要花费大量的时间,特别是一开始,记得101背到我想吐,莫尼卡的那句 “THERE IS NOTHING TOTELL@!#$%@#%@!%@$#%”可以直接当减肥药了,一听到就想吐!!但是,有一点保证,以后老外用多快的速度,我都能听懂她在说“THERE IS NOTHING TOTELL@!#$%@#%@!%@$#%”而且可以和她说的一样快,一样纯正的美国纽约音。兄弟们~~~代价惨重阿~~~~~`你可以算一下,一集大约20分钟,每句话重复10遍,那是什么概念,就是一集学下来要200分钟,折合3个多小时,如果你特别笨的话,多跟几遍,时间又上去了,我经常会思想溜号,A-B的时候不知道想什么去了,就要多重复几遍。我当初算了一下,我大约要跟到第7遍的时候才有感觉,前面不是语速慢了,就是快了,要么就是停顿不对,也可能我比较笨?加上笨的原因,加上溜号,大约有4个小时一集把.

下面分析一下他们六个人的口音语速,RACH,我最喜欢的角色,她的口音不很好学,因为她经常会发出很可爱的声音,感情丰富啊,而且连音也比较多,但是学她很有用,因为她的发音很性感,个人认为。CHANDLER这个家伙经常会把我逼疯的,他太贫了,语速又快,最难学了,,最好学的是PHEEBS,很喜欢她,她的发音很圆润,语速也很正常,MONIKA 可以用她来练长句子,她经常会一口气说很多,JOEY,他反映慢,语速适中应该是最好学的一个,可是他的声音太低了,不适合女生学,我学他太吃力了,男生的话是个首选~~~~

这样我整了3季的时候,除了生词,在新天地泡吧的时候,可以和老外自由对话,心理满足了一把

过了3季,后面的7季就会块很多,因为很多句子,在你的耳朵里已经是很简单的,根本不需要重复,你要练习的只是特别难的那些长句,记不记得伦敦之行?走之前,莫尼卡的那一口气说完的长句子,呵呵,那就是最高境界,你可以脱口而出,和她一样快,一样不喘气,后面的你就不用跟了,你可以出师了~~~
但是,这是3季以后的事了,3季不过,一切免谈~~~

而且有一项工作是必须作的,是贯穿10季的工作,那就是笔记!!!
除非你的牛人,不过牛人也就不来看我这个帖子了,呵呵

笔记很重要,里面会有生词,特别是“该死的ROSS”,他在里面经常不出好词,你就查吧,

再就是俚语,很多俚语这才是地道的美语,你只有作了笔记你才有积累,最重要的是多有成就干啊,看到那么多的笔记,我的笔记可以从地板摞到写字台那么高,因为我字特别大?不是!是我做得很细!细到从头看IS的用法,把它当作一个事业来做,当作一个重整英语的契机,好好的梳理一下自己的存货。

说实话,这也很痛苦的~~~~~看肥皂剧是很开心的,可是学肥皂剧就没那么开心了
最后,就是坚持的动力了,
我不知道别人是为什么,要学好英语,但是你的动力要足,而且经常要受受刺激,否则的话很容易坚持不下来。

好啦,罗嗦了一大堆,就是想献给所有喜欢F6的朋友,因为老在各个F6的英文论坛上潜水,只当不传,现在写了这一大队,也不知道对你有没有用,不管怎么样,鲜花鸡蛋,统统收下了。

谢谢~~~~
【转】Matlab 心得

Today I need to give a presentation on Matlab. So I read some documents and relevant questions. Here is some studies form other people who have already known matlab well.

matlab心得zz 首先我想说的是,matlab跟其他语言不一样(我用的比较多的编程语言,除了matlab就应该是c或c++了,VB和Delphi也接触过,我想大部分人也差不多),如果你抱着“把其他语言的思想运用在matlab里面”的话,那么我想,即使程序运行不出错,也很难把握matlab的精髓,也就很难发挥matlab的作用了。所以,如果你是希望matlab作为VC的附属品,即你不想在matlab上面花太多功夫,只纯粹想用matlab来完成VC做不了或很难做成的任务的话,那么,这篇文章你也不需要再阅读下去了;如果你是希望掌握一门语言、一个工具,使它更有效为你服务的话,那么,希望本文对你有所帮助。 Matlab是一个基于矩阵运算的软件,这恐怕是众所周知的事情了,但是,真正在运用的时候(就是在编程的时候),许多人(特别是初学者)往往没有注意到这个问题,因此,for循环(包括while循环)满天飞…………..这不仅是暴殄天物(没有发挥matlab所长),还浪费了你宝贵的时间。对此,一些朋友(MVH)在他的“MATLAB 小技巧”一文中也有所涉及,雷同的东西我也就不重复了,matlab的“帮助”里面也有相关的指示。我这里想说的一点是,初学者往往在初始化矩阵的时候注意到这个问题,懂得了使用矩阵而不是循环来赋值,但是,在其他环节上,就很容易疏忽,或者说,仍然没有摆脱C++的思想。举个例子吧,下面的代码是我的一个师弟写的,我想他接触matlab也有2、3年时间了(在此说明一下,接触2、3年并不是表示每天都会跟matlab打交道,我本人也不是,只是在一年某几个时间段里面连续使用),但是仍然会出现类似的问题:

J = 0;

lt = size(imf1,2);

for (i = 1:lt)

if (abs(imf1(i)) > 1)

J = 1;

break

end

end

上面的代码实现了一个目的――检查信号imf1(一个向量)是否存在绝对值大于1的点,这显然是基于C++的思想写出来的。如果在matlab下面,其实用两个语句就足够了(当然,可以合并为一个): q = find(imf1>0); J = ~isempty(q); 这样的修改带来的好处是很可观的。 又如: for j = 1:num imf1(start1+j) = 2*li1(j+1) - imf1(start1+j); end 这是一个对称翻折的问题,它完全可以用以下这个语句简洁表示: imf1(start1+1:start1+num) = 2*li1(2:num+1) - imf1(start1+1:start1+num); 因此,如果是新手,可以先用循环(基于C++的思想)来编写代码,然后看看能否用matlab的语言(基于矩阵的思想)来改进。当然,这样做的前提是你对matlab提供的一些函数比较熟悉才行,这些函数在matlab的“帮助”那里搜索“Functions Used in Vectorizing”就可以找到一些,其他的也可以找相关的书籍(没找到?不可能,电子版总可以下载到的) 对提高matlab编程能力的方法,我想主要有以下三个:

1. 查help

2. 多上上论坛,搜索帖子、发帖子问人

3. 阅读别人、特别是牛人的程序

当然了,正如所有的程序语言一样,“3分课本7分上机”,一定要动手才行,不能光看。多想、多思考、多尝试,才是正路。

最后,整理一下常用的快捷键(用【】表示)或命令:

1. 在命令窗口(Command Window)中: 1) 【上、下键】――切换到之前、之后的命令,可以重复按多次来达到你想要的命令 2) clc――清除命令窗口显示的语句,此命令并不清空当前工作区的变量,仅仅是把屏幕上显示出来的语句清除掉 3) clear――这个才是清空当前工作区的变量命令,常用语句clear all来完成 4) 【Tab】键――(转自版友心灯)在matlab@hit.edu.cn看到的:在command窗口,输入一个命令的前几个字符,然后按tab键,会弹出前面含这几个字符的所有命令,找到你要的命令,回车,就可以自动完成。目前讨论结果是:matlab6.5版本中,如果候选命令超过100个,则不显示。而在matlab7以后版本中,则没有这个显示,均可正常提示 5) 【Ctrl+C】(或【Ctrl+Break】)――(转自版友yangjin_ren)在matlab程序运行过程中,可能由于程序编写的失误,导致程序不停的运行,在命令窗口输入“Ctrl+C”可以将运行的程序停下来,而不需要将整个Matlab程序关掉。不过进行此操作的前提是能够激活切换到命令窗口才行,呵呵。


2. 在编辑器(Editor)中: 1) 【Tab】(或【Ctrl+]】)――增加缩进(对多行有效) 2) 【Ctrl+[】--减少缩进(对多行有效) 3) 【Ctrl+I】--自动缩进(即自动排版,对多行有效) 4) 【Ctrl+R】――注释(对多行有效) 5) 【Ctrl+T】――去掉注释(对多行有效) 6) 【Ctrl+B】――括号配对检查(对版本6.5有效,但版本7.0无效,不知道是取消了还是换了另外的快捷键,请大牛们指点,其他版本没有测试过) 7) 【F12】――设置或取消断点 8) 【F5】――运行程序其余的例如在Debug状态下的快捷键就不多说了,自己看菜单Debug吧 累了, 有时间再写吧。希望大家多交流~~~~~~


关于计时我摸索到这样的语句,tic; t=toc; 程序运行到tic时,开始计时,以秒为单位。运行到t=toc时,就把这个时间值赋给了t.如果再运行到t=toc语句,会把累计时间赋给t. 这应该是很有用的,在matlab中有时候会运行到死循环,而又不会改库函数时,就可以用这个计时变量,当时间t大于定值时跳过这个循环。

Monday, April 19, 2010

If you are a Chinese and using English Windows 7!

How to switch you langrage setting from English to Chinese and support Chinese character rendering!

Control Panel->Change Keyboards or other input methods->Administrative->Change System Locale->Pick Chinese Simplified PRC etc or Traditional Taiwan etc based on your needs.

Saturday, April 17, 2010

There is an opportunity to continue the research on Computer Vision!

I found a project on pattern recognition in our department. As separated from computer vision for one year, I really want to return and do something!

More than one year ago, I met a very kind person. He guided me and told me what is research and how to do research. He is very kind… Although I made mistakes, wasted time and ignore his requirements sometime, he never drops me or leaves me alone. He use his patient and wisdom drive away the darkness occupying at the front of me!

From then on, I really want to follow your example, to be a person could give others hope. Dr. Cao, please give me a little more time, and I will not let your down!

Wednesday, April 14, 2010

How to use “FreeGLUT” on windows with MinGW and Qt Creator


GLUT has been a very popular light weight library for student and enter-level researchers for years, as its clear structure, not excluded I mean, small size and perfect connectivity with OpenGL. However, GLUT is not a free software and has not been maintained for a while, although I am not sure about the maintainability of GLUT, it has been same since I was an undergraduate and learn OpenGL first time. So FreeGLUT is another recommended option for GLUT people.
In recent days, I am trying to compile and program some code on Window with GCC/G++. My first idea is Cygwin, which is an total solution for GNU stuff on Windows. However, the problem is that Cygwin does not have a IDE for Qt development and you have to take care all of the make file and dependence. Instead, I think MinGW is an executable substitution. Qt Creator is based on MinGW and Qt library has been deployed on MinGW. So, comparing the problem caused by Qt on Cygwin and make file, I prefer to transplant FreeGLUT to MinGW!
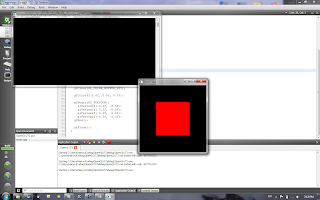
Ok, let us begin the instruction! The installation of FreeGLUT is simple! As I mentioned, FreeGLUT is a light weighted, the package is small. Some kind hearted people has been compiled the source code and publish it on the web. Thanks for that! You may download a package called “freeglut-MinGW-2.6.0-3.mp.zip” and unzip it. You gonna get two folders and a DLL( if you do not know what is DLL, forget about it)! Please copy the header files in “include/GL” to “include/GL”, which may under “C:\Qt\2010.02.1\mingw\”, and copy the lib files in “lib” to “C:\Qt\2010.02.1\mingw\lib”. Then you need to copy the “freeglut.dll” to system32, or sysWOW64, if you are using a 64 bit computer. The next step is configure Qt creator. Make sure that your PRO file has “QT += opengl” and “LIBS += libfreeglut”! That is all, enjoy the “Hello world” below!

If you want to know something about static linking or beyond, please chech this blog:
http://www.transmissionzero.co.uk/computing/using-glut-with-mingw/

#include
#include

void keyboard(unsigned char key, int x, int y);
void display(void);

int main(int argc, char** argv)
{
glutInit(&argc, argv);
glutCreateWindow("GLUT Test");
glutKeyboardFunc(&keyboard);
glutDisplayFunc(&display);
glutMainLoop();

return EXIT_SUCCESS;
}


void keyboard(unsigned char key, int x, int y)
{
switch (key)
{
case '\x1B':
exit(EXIT_SUCCESS);
break;
}
}


void display()
{
glClear(GL_COLOR_BUFFER_BIT);

glColor3f(1.0f, 0.0f, 0.0f);

glBegin(GL_POLYGON);
glVertex2f(-0.5f, -0.5f);
glVertex2f( 0.5f, -0.5f);
glVertex2f( 0.5f, 0.5f);
glVertex2f(-0.5f, 0.5f);
glEnd();

glFlush();
}

My first work has been labelled a sick tag

I have gotten my first publication few days ago. Instead of exacting and celebrating, I feel a little sorrow and upset. My undergraduate work, action recognition, accepted by ICPR, keep her as the fourth author. I do not care which slot I should be placed, as I know I only initialize the topic and write little code for the idea. My colleagues and formal supervisor put a lot of efforts on it. One day, the paper published, it means our ideas, our implementations and results are highly acknowledged by the computer vision community and other researchers.
But, there are still an individual, doing nothing but keep her name on it. If I were her, I will be very shamed on this, no matter it is intent or not.
You need papers, me too. But if you cannot publish those paper by your own, how could you demand your student to do so?

Sunday, April 11, 2010

You enhanced my strength and confidence, thank you!

Today, another boring Sunday morning, we get up later. Maybe the shopping yesterday consumed to much energy, or the food yesterday have not recover her body from shopping, Coco does not feel well. She sweats out a lot and even wet the bed sheet. I cook some hot food for her, including a bowl of spicy soup, two hot dogs and a cup of coffee. Hope she gonna eat them up, but she disappointed me once more. Whit no other options, I swallow the remainder and go to lab.

Up to now, everything in my life goes well and ordinary, go to lab without propers and cook meals without motivations. But now, it is changes by an Email, the paper was accepted by a conference, which means I have publication now......

New graduate school, new job opportunities and new colleagues/supervisor are waiting for me.....
Thanks!